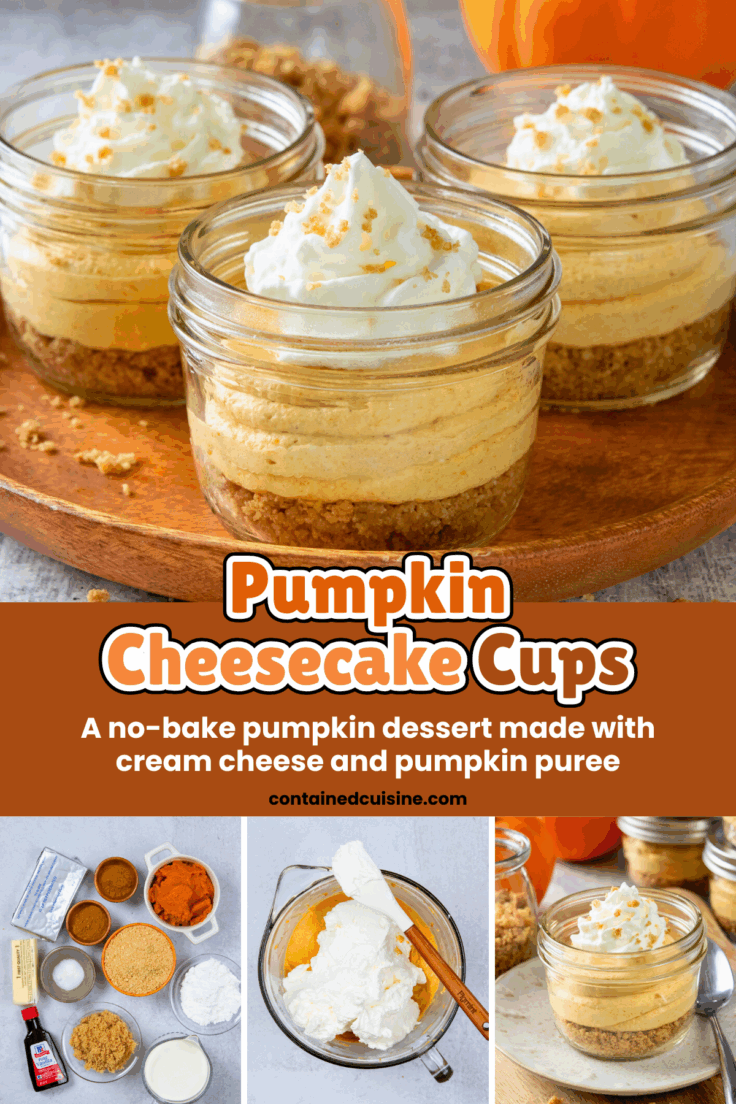
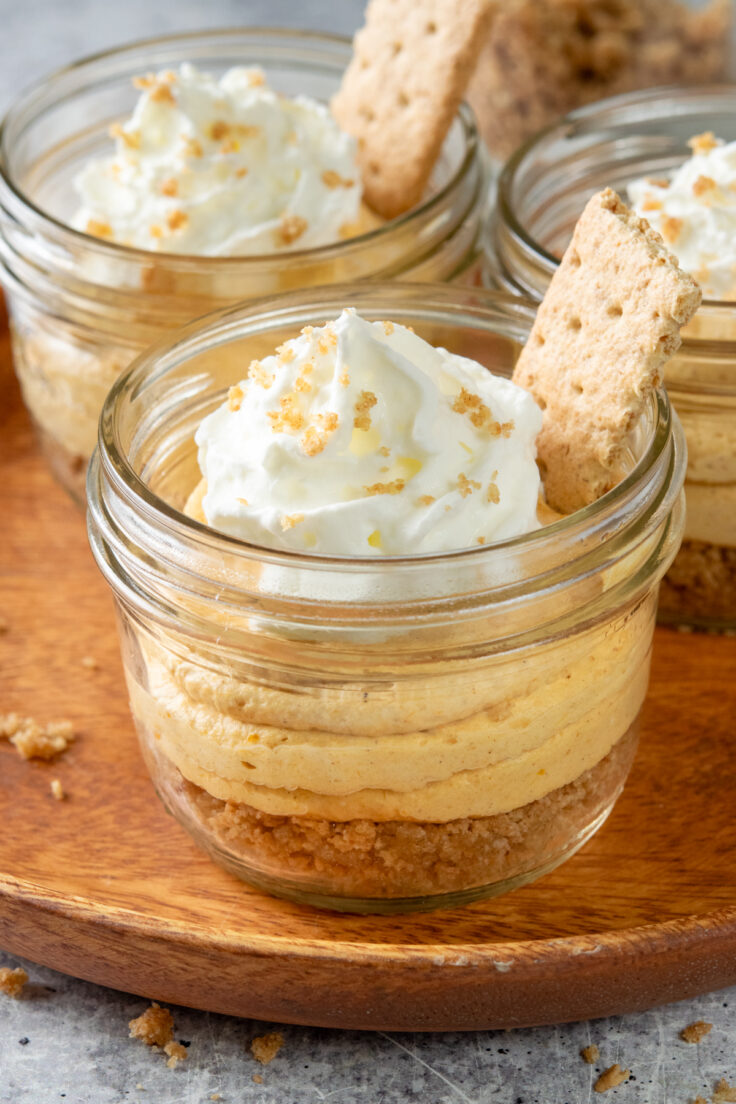
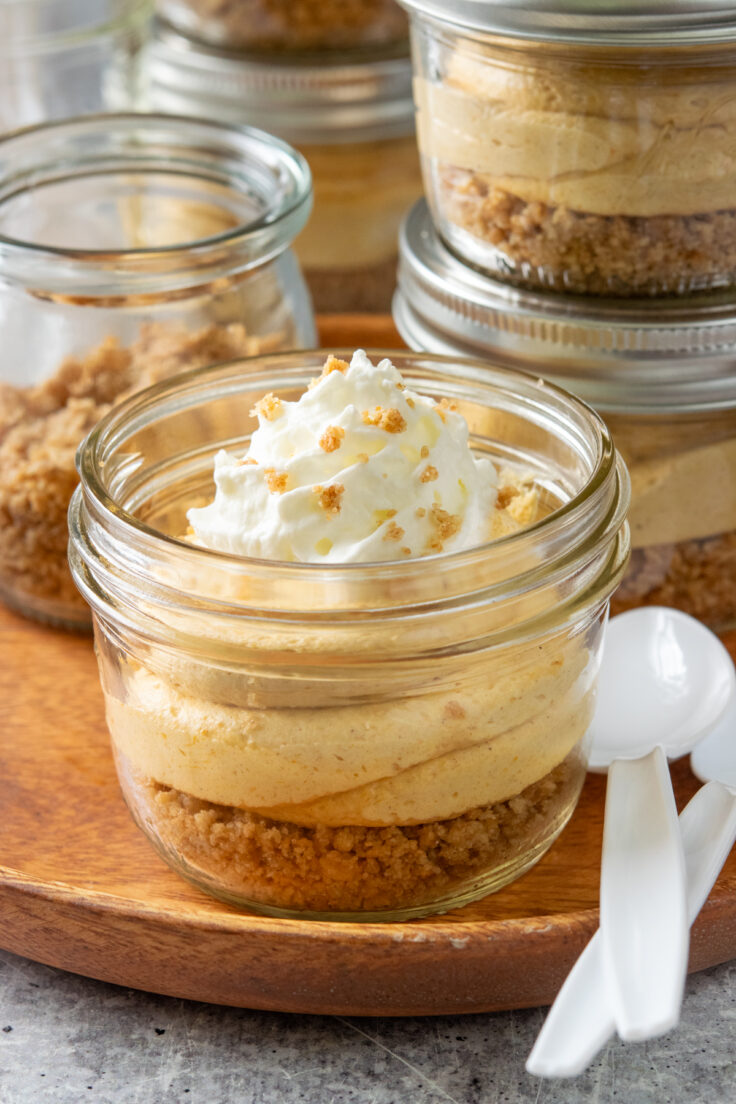
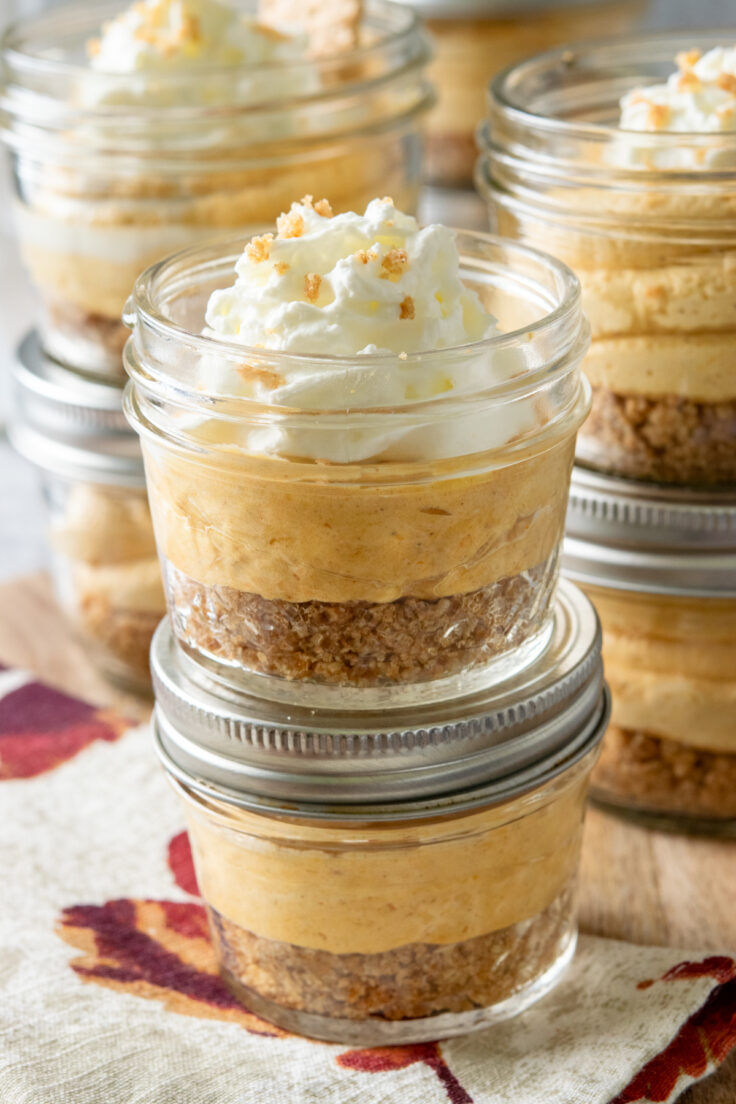
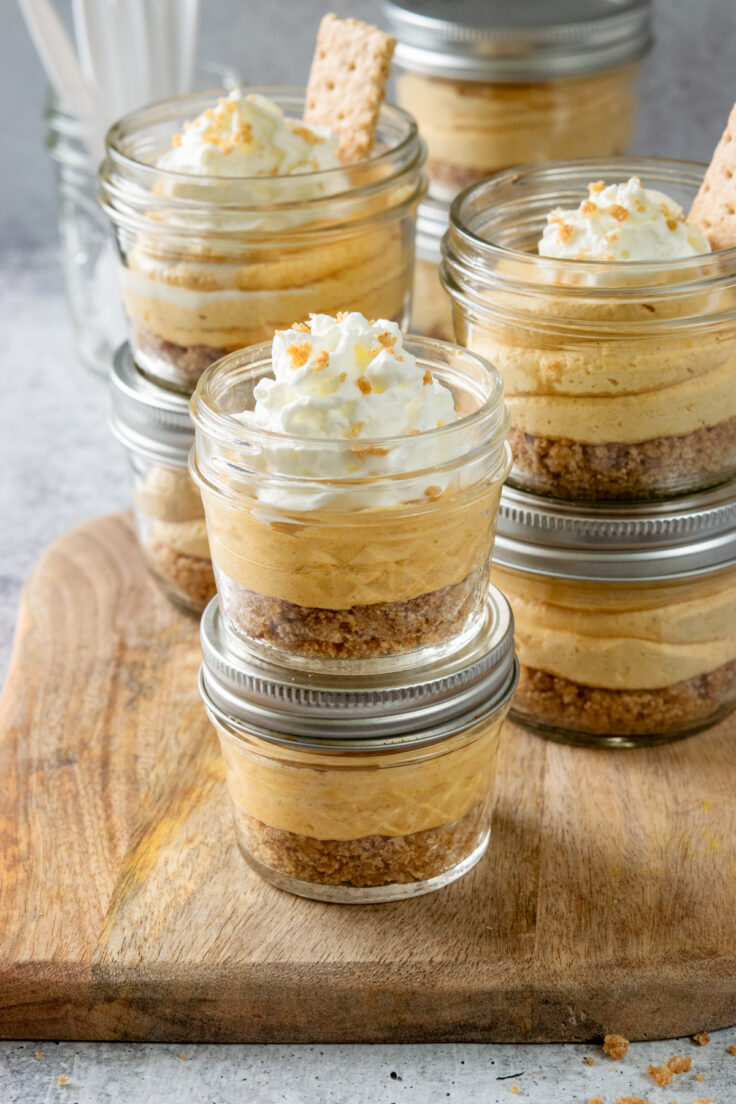
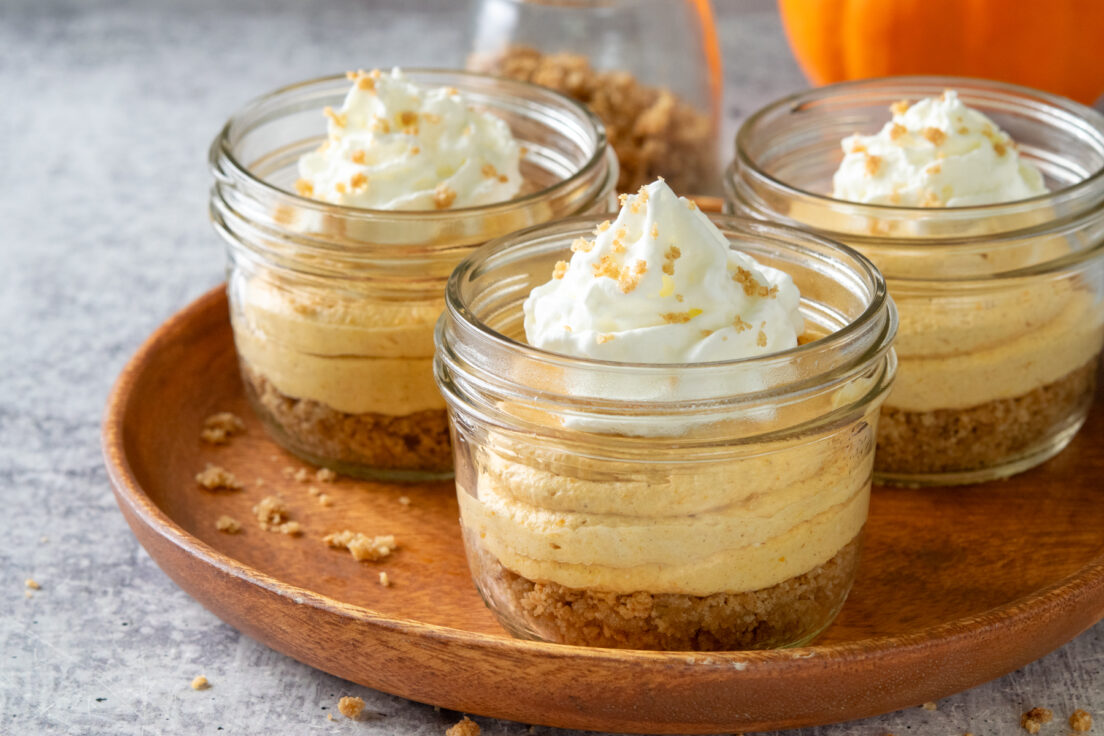
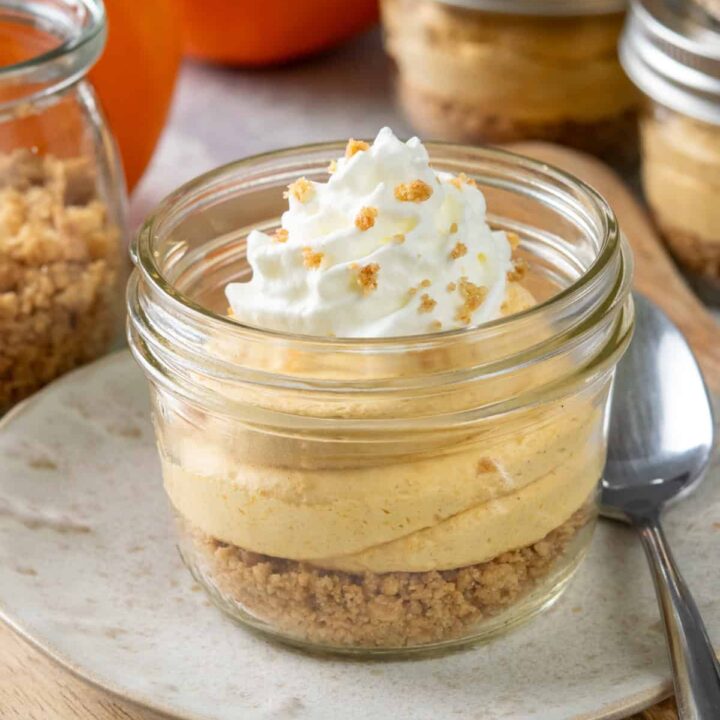
No-Bake Pumpkin Cheesecake Cups are the perfect single-serving fall dessert. Each cup is layered with buttery graham cracker crust, creamy pumpkin cheesecake filling, and a swirl of homemade whipped cream on top. They’re festive, portioned into individual servings, and just right for a Thanksgiving dessert table or any fall party.
If you’re craving a pumpkin dessert that’s easier than pie but just as delicious, these mini pumpkin cheesecakes are the answer. With the spiced flavor of pumpkin, the tangy richness of cream cheese, and the convenience of a no-bake recipe, they check all the boxes.
Honestly, this has become one of my favorite pumpkin desserts to make and serve; my family fully approves! They’re quick to put together, easy to share, and always disappear fast.
Why You’ll Love These Pumpkin Cheesecake Cups
No-Bake Dessert – No oven needed here. Just whip, layer, and chill for a fall dessert that looks impressive but takes very little effort.
Pumpkin Cheesecake Flavor – The filling blends pumpkin puree, cream cheese, warm spices, and a hint of brown sugar for cozy fall flavor in every bite.
Make-Ahead Friendly – You can assemble these cups a few days in advance and simply add the whipped cream topping when it’s time to serve. Perfect when the kitchen is already busy with holiday cooking.
Perfect for Gatherings – Since they’re pre-portioned in jars or cups, guests can just grab one and dig in. As a bonus, there’s no slicing of pie required or messy pie crumbs everywhere.
Thanksgiving-Ready – These mini pumpkin desserts are a festive twist on pumpkin pie that fit right in on a holiday dessert table, alongside the traditional pies.
Love Single-Serving Desserts?
If you enjoy these Pumpkin Cheesecake Cups, you’ll also love my No-Bake Key Lime Pie in a Jar. It’s another layered mason jar dessert that’s just as easy and crowd-pleasing.
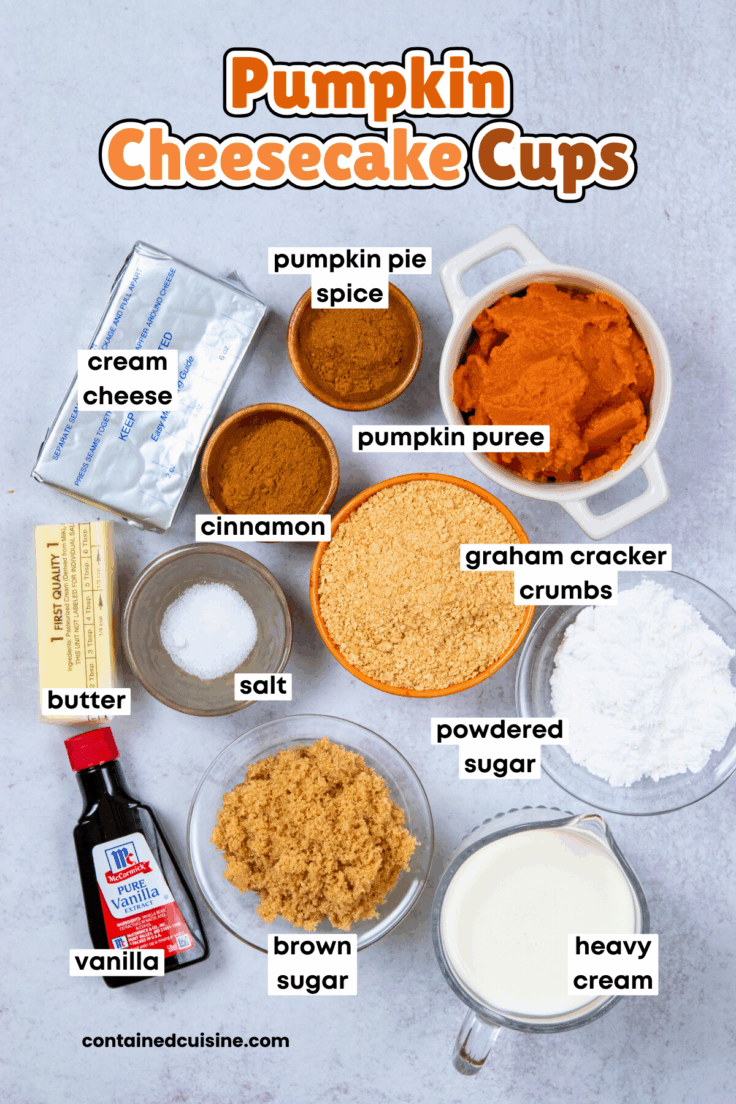
Ingredients Needed
For the crust:
- Graham crackers (or gingersnaps, chocolate wafers, or Biscoff cookies)
- Light brown sugar
- Cinnamon
- Melted butter
For the pumpkin cheesecake filling:
- Heavy cream (whipped into stiff peaks)
- Cream cheese, softened
- Pumpkin puree
- Light brown sugar
- Powdered sugar
- Pumpkin pie spice
- Cinnamon
- Salt
- Vanilla extract
For the whipped cream topping:
- Heavy cream
- Powdered sugar
- Vanilla extract
Ingredient Notes
Pumpkin Puree – Be sure to use 100% pure pumpkin, not pumpkin pie filling.
Cream Cheese – Full-fat cream cheese creates the creamiest cheesecake filling.
Heavy Cream – Whipped to stiff peaks, it lightens the filling and makes a fluffy topping.
Brown Sugar – Adds a little molasses depth to the filling and enhances the pumpkin flavor.
Powdered Sugar – Helps stabilize the no-bake filling (the role eggs play in baked cheesecake).
Graham Crackers (or Alternatives) – The classic choice for crust, but gingersnaps, chocolate wafers, or Biscoff cookies all bring unique flavor twists. Biscoff adds a caramelized, spiced note that pairs especially well with pumpkin.
Supplies for Making Pumpkin Cheesecake Cups
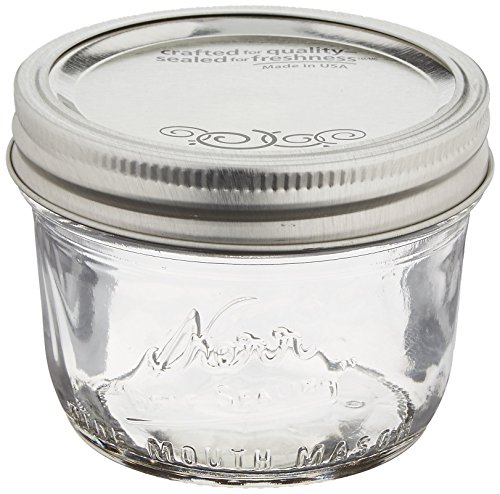
- About eight 8-ounce wide-mouth mason jars – My favorite option for layering and serving. This 12-pack of Kerr wide-mouth jars are perfect for parties.
- Or about sixteen 4-ounce jars or clear disposable cups – Great for mini pumpkin desserts when you want smaller portions. This 24-pack of Ball quilted mason jars are perfect for making mini servings.
- Or about 30 shot glass–size cups (2-ounce) – Perfect for bite-sized dessert tastings at parties.
- Piping bag (optional) – Makes adding neat layers of cheesecake filling easier.
- Whipped cream & fall garnishes – Cinnamon, nutmeg, or even a sprinkle of cookie crumbs for decoration.
How to Make No-Bake Pumpkin Cheesecake Cups
Detailed recipe and instructions are in recipe card at bottom of post.
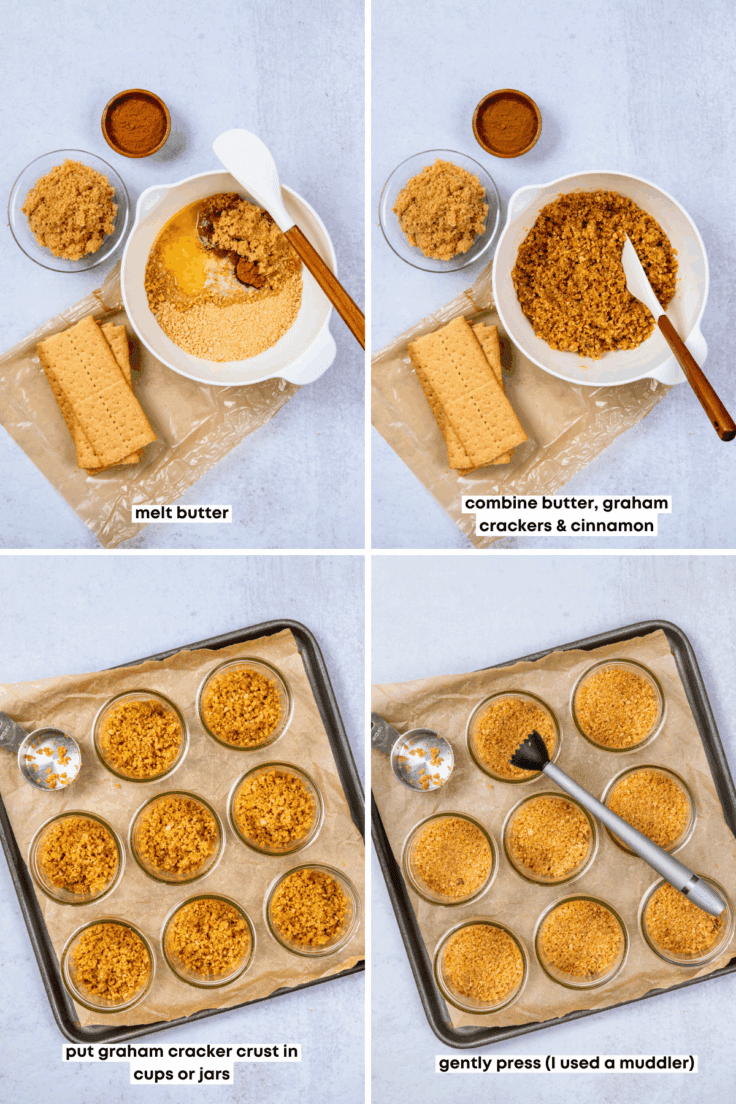
- Make the crust – Stir together graham cracker crumbs (or Biscoff cookie crumbs for a warm, spiced twist), brown sugar, cinnamon, and melted butter. Before dividing into jars, set aside a couple of tablespoons of the mixture to use later as a garnish. For eight 8-ounce cups, spoon about ¼ cup of the crust mixture into each; for 4-ounce cups, use about 2 tablespoons. Press the crumbs down lightly so they hold together, but not so firmly that it’s hard to scoop with a spoon. (I like to use a muddler for this step, but the back of a spoon works just as well.)
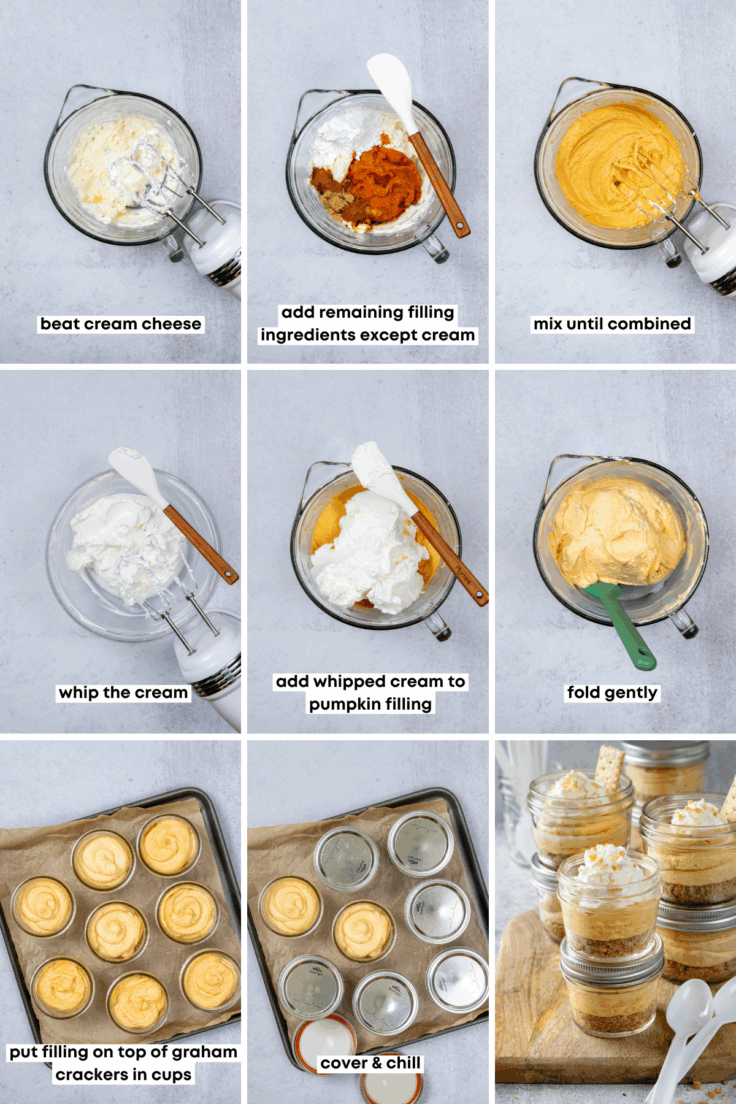
- Make the pumpkin cheesecake filling – Whip the heavy cream to stiff peaks, using a cold bowl and cold beaters for best results, then set aside. In a separate bowl, beat the cream cheese until smooth. Add the pumpkin puree, brown sugar, powdered sugar, pumpkin pie spice, cinnamon, salt, and vanilla, and mix until creamy. Gently fold in the whipped cream until light and fluffy—avoid stirring too hard, as you don’t want to deflate it. For 8-ounce cups, spoon in about ½ cup of filling; for 4-ounce cups, use about ¼ cup.
- Assemble the cups – Evenly divide the pumpkin cheesecake filling among the cups, spooning (or piping) it over the crust layer. Each cup should end up with one crust layer on the bottom and one filling layer on top.
- Chill – Cover and refrigerate the cups for at least 4 hours, or overnight, to let the flavors meld and the filling firm up.
- Make the whipped cream topping – In a cold bowl with cold beaters, whip the heavy cream with powdered sugar and vanilla until soft peaks form. For the best texture, make the whipped cream closer to serving time. If the cheesecake cups were made ahead, wait until the day of serving to whip the topping. Swirl or dollop on top of each cup, then sprinkle with the reserved graham cracker crumbs for garnish.
Making the Graham Cracker Crust:
Recipe Tip: My absolute favorite part is getting a spoonful with that buttery, crunchy crust along with the creamy pumpkin cheesecake. If you’re like me, you can double the crust recipe (no need to double the filling) and build your cups with two layers of each—extra crust lovers, rejoice!
Making the Pumpkin Cheesecake Filling:
Recipe Notes
Serving Sizes – This recipe makes about 8 desserts in 8-ounce cups, 16 in 4-ounce cups, or up to 30 mini shot-glass size cups. Perfect for tailoring to your crowd.
Make Ahead – The crust and filling can be layered up to 3 days in advance. Keep the cups tightly covered with plastic wrap or stored in a sealed container. Add the whipped cream topping just before serving so it stays fresh and fluffy.
Storage Tip – To store cups or jars without lids, place the cups on a baking tray or in a baking dish and cover with plastic wrap. If you need to stack them, use a deep container and place a piece of sturdy cardboard between layers to protect the toppings.
Variations – Double the crust layers (crust, filling, crust, filling, whipped cream) if you’re a crust-lover like me. Swap in Biscoff cookies for a spiced caramel-like flavor, or go all out with a drizzle of caramel sauce on top for extra indulgence.
More Fall Desserts to Try
Build a Fall Dessert Table
If you’re putting together a Thanksgiving dessert spread, Pumpkin Cheesecake Cups are a perfect make-ahead mini dessert. Pair them with something crunchy and salty like my Salted Caramel Pretzel Bark and a warm, cozy Apple Pie Dump Cake for a variety of flavors.
Want something dippable? My Caramel Apple Cheesecake Dip is another easy fall favorite that disappears fast at parties.
More Pumpkin Recipes to Try
No-Bake Pumpkin Cheesecake Cups
Pumpkin Cheesecake Cups are a no-bake dessert with layers of spiced pumpkin cheesecake filling and a buttery graham cracker crust. Served in cups or jars, they’re the perfect make-ahead mini pumpkin dessert for fall gatherings and a fun twist on pumpkin pie for Thanksgiving.
Ingredients
Graham Cracker Crust
- 1 cup graham cracker crumbs
- 6 tablespoons butter, melted
- 4 tablespoons light brown sugar
- 1/2 teaspoon cinnamon (optional)
Pumpkin Cheesecake Filling
- 1 cup heavy cream
- 8 ounces cream cheese, softened (1 brick)
- 1/2 cup pumpkin puree
- 1/2 cup powdered sugar
- 2 tablespoons light brown sugar
- 1/2 teaspoon vanilla
- 1 teaspoon pumpkin pie spice
- 1 teaspoon cinnamon
- 1/8 teaspoon salt
Whipped Cream Topping
- 1 cup heavy cream
- 2 tablespoons powdered sugar
- 1/2 teaspoon vanilla
Instructions
Notes
Serving Sizes – This recipe makes about 8 desserts in 8-ounce cups, 16 in 4-ounce cups, or up to 30 mini shot-glass size cups. Perfect for tailoring to your crowd.
Make Ahead – The crust and filling can be layered up to 3 days in advance. Keep the cups tightly covered with plastic wrap or stored in a sealed container. Add the whipped cream topping just before serving so it stays fresh and fluffy.
Storage Tip – To store cups or jars without lids, place the cups on a baking tray or in a baking dish and cover with plastic wrap. If you need to stack them, use a deep container and place a piece of sturdy cardboard between layers to protect the toppings.
Variations – Double the crust layers (crust, filling, crust, filling, whipped cream) if you’re a crust-lover like me. Swap in Biscoff cookies for a spiced caramel-like flavor, or go all out with a drizzle of caramel sauce on top for extra indulgence.
Recommended Products
As an Amazon Associate and member of other affiliate programs, I earn from qualifying purchases.